🛝 Slides
Access the CryoCloud powerpoint whenever you need to reference it
Open the powerpoint by directly clicking on the hyperlink above.
Open CryoCloud
Scroll through the languages. Choose the Python programming language.
Scroll through the server sizes. Choose the 7 Gb server.
Sit back and learn about each of the tools!
How to bring your own environment
JupyterHub options and viewing setup
GitHub
Virtual Linux desktop
SyncThing
Viewing and editing of different files
Bring Your Own environment (custom Docker image)
CryoCloud allows you to launch your server using different software environments. Each environment corresponds to a Docker image, which defines the libraries, tools, and versions available to you. Switching Docker images is similar to switching between computers that have different applications installed.
Using a custom Docker image is useful when you want:
A different software stack than the defaults
An older or reproducible version of CryoCloud’s environment
A specialized environment from an external registry (e.g., Pangeo, Rocker)
This feature is called Bring Your Own Image (BYOI).
1. Selecting an environment when launching CryoCloud
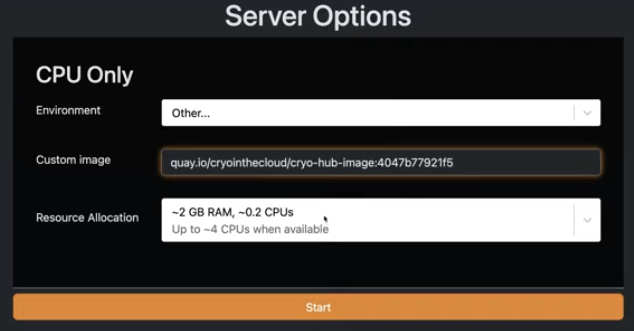
When you open CryoCloud, the Environment dropdown provides:
Python
R
Matlab
Other
Build Your Own
To use a custom Docker image, select Other. A field labeled Custom image will appear. This is where you will paste the Docker tag for the environment you want.
2. Finding a Docker tag
A Docker tag tells CryoCloud which exact environment to use. You can choose tags from CryoCloud’s maintained images or from Docker Hub.
Option A: Use an older or alternate CryoCloud environment
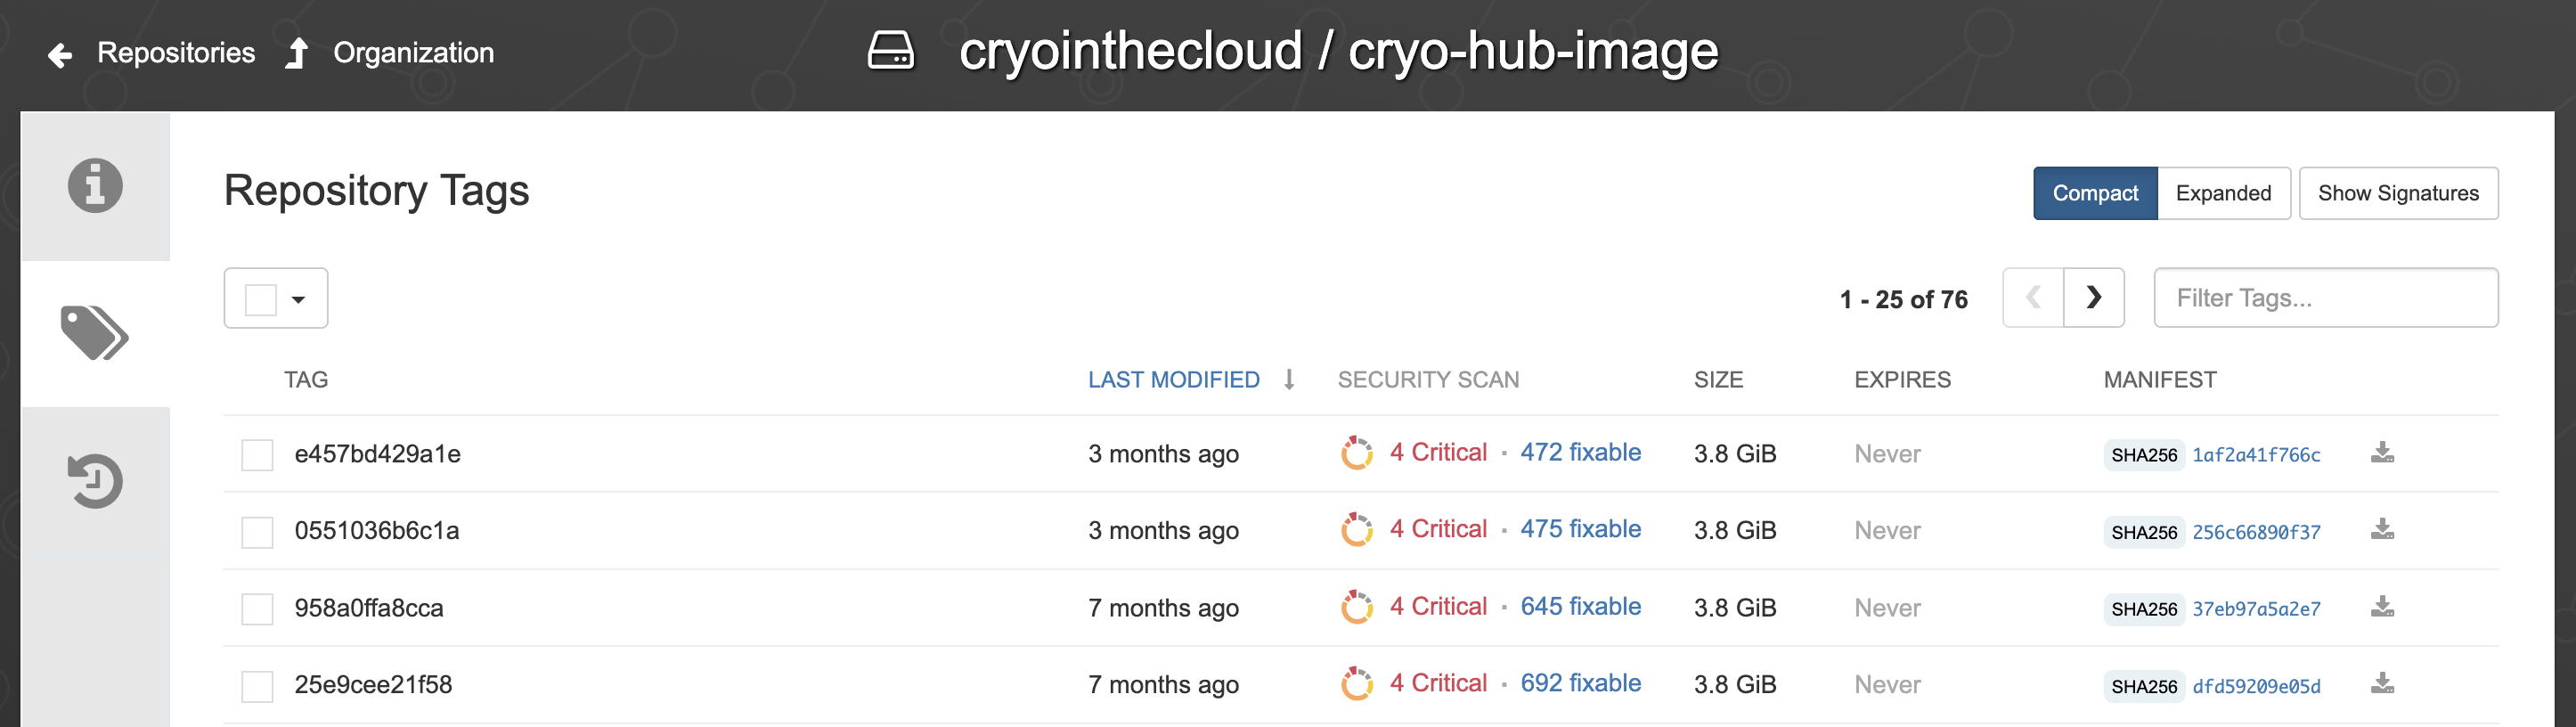
CryoCloud publishes its Python environment image to Quay.io, Red Hat’s hosted container image registry service which is free for publicly accessible container images.
Visit the repository tags page: https://
quay .io /repository /cryointhecloud /cryo -hub -image ?tab = tags Browse the available tags. Each tag corresponds to a specific version.
Copy the full tag in the following form:
quay.io/cryointhecloud/cryo-hub-image:<tag>
Example:
quay.io/cryointhecloud/cryo-hub-image:e457bd429a1ePaste the tag into the Custom image field on CryoCloud. For reference, this image is built from the code in: https://
Option B: Use an image from Docker Hub
You may also use any public Docker image from Docker Hub.
Search for images at: https://
hub .docker .com/ Tags typically follow this format:
account/image:tag
Example:
pangeo/ml-notebook:latest
rocker/geospatial:4.4
Paste any valid tag into the Custom image field.
Example: Using a machine learning environment
If you want a Pangeo machine learning environment, enter:
pangeo/ml-notebook:latestCryoCloud will launch your session using that environment.
Tips
If an image does not launch, ensure it includes a Jupyter-compatible single-user interface.
Private images requiring authentication are not currently supported through the UI.
Images must be Linux-based and appropriate for JupyterHub.
Use explicit tags (not
latest) when reproducibility is important.
Build Your Own image
CryoCloud also supports creating a fully customized environment using your own environment.yml file. This option is useful when you want complete control over the software stack and only want the packages you specify.
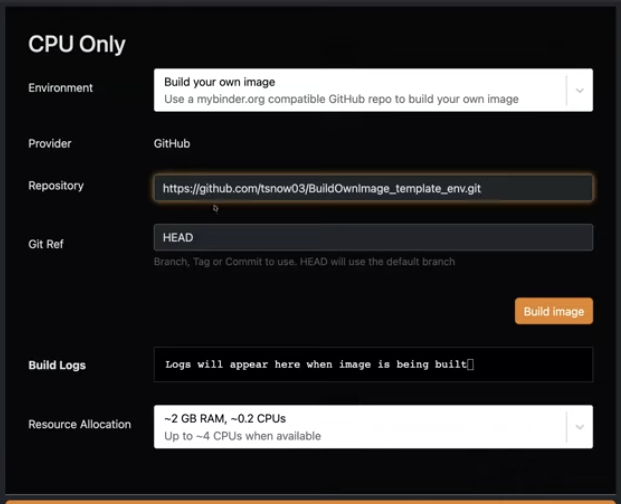
When launching CryoCloud, select Build Your Own from the Environment dropdown.
A field labeled Repository will appear. This is where you will paste the URL of a GitHub repository that contains an environment.yml file.
Example: Using a minimal template repository
You can start with a simple example environment from the following template repository:
https://github.com/tsnow03/BuildOwnImage_template_env.gitTo copy the correct link from your own repository:
Open your GitHub repository.
Click the blue Code button.
Copy the HTTPS URL (it should end in
.git).
CryoCloud will use the environment.yml found in that repository to build your image.
Building the Image
Paste the repository URL into the Repository field.
Click Build image.
CryoCloud will begin building a Docker image based on your environment.yml. Build times vary depending on the number of packages:
Simple environments: ~30 seconds
Large or complex environments: up to ~1 hour
If the build process encounters an issue, an error message will appear in the log so you can revise your environment.yml.
After the image is built once, you can easily select it again in future sessions.
Tip: Test your environment.yml locally using Mamba before using Build Your Own to speed up the build process and avoid waiting through repeated failures.
Task: Clone the CryoCloud jupyterbook
We will clone (e.g. make a local copy of) the workshop repository.
To do this:
Select the plus (
+) sign above theFile Browserto the left, which will bring up aLauncherwindow.Click the
terminalbutton under Other to open it. This is your command line like you would have on any computer.Before cloning the repo, you have the option to switch to another file folder using the change directory terminal command:
cd folderif you do not want the Hackweek repo in your current directory (you can check which directory you are currently in using print working directory command:pwd).cd yourfoldernameNow clone the workshop code into your current directory:
https://github.com/geojupyter/workshop-open-source-geospatial.gitYou will see the folder pop into your
File Browseron the left if you have the current directory open. Click on the folder to navigate through the files.To open this tutorial, click on the
materialssubdirectory >01-working-in-jupyterhuband double click onindex.md. This should open up this tutorial in case you want to review it in the future.
Now after the demo...
Shutting down your JupyterHub
Whenever you are done, it is best to shut down your server when you sign out to save on money for CryoCloud. Time on the JupyterHub costs money and there are systems in place to make sure your server doesn’t run indefinitely if you forget about it. After 90 minutes of no use, it will shut down. We prefer you shut down the server when so we save that 90 minutes of computing cost.
To do so:
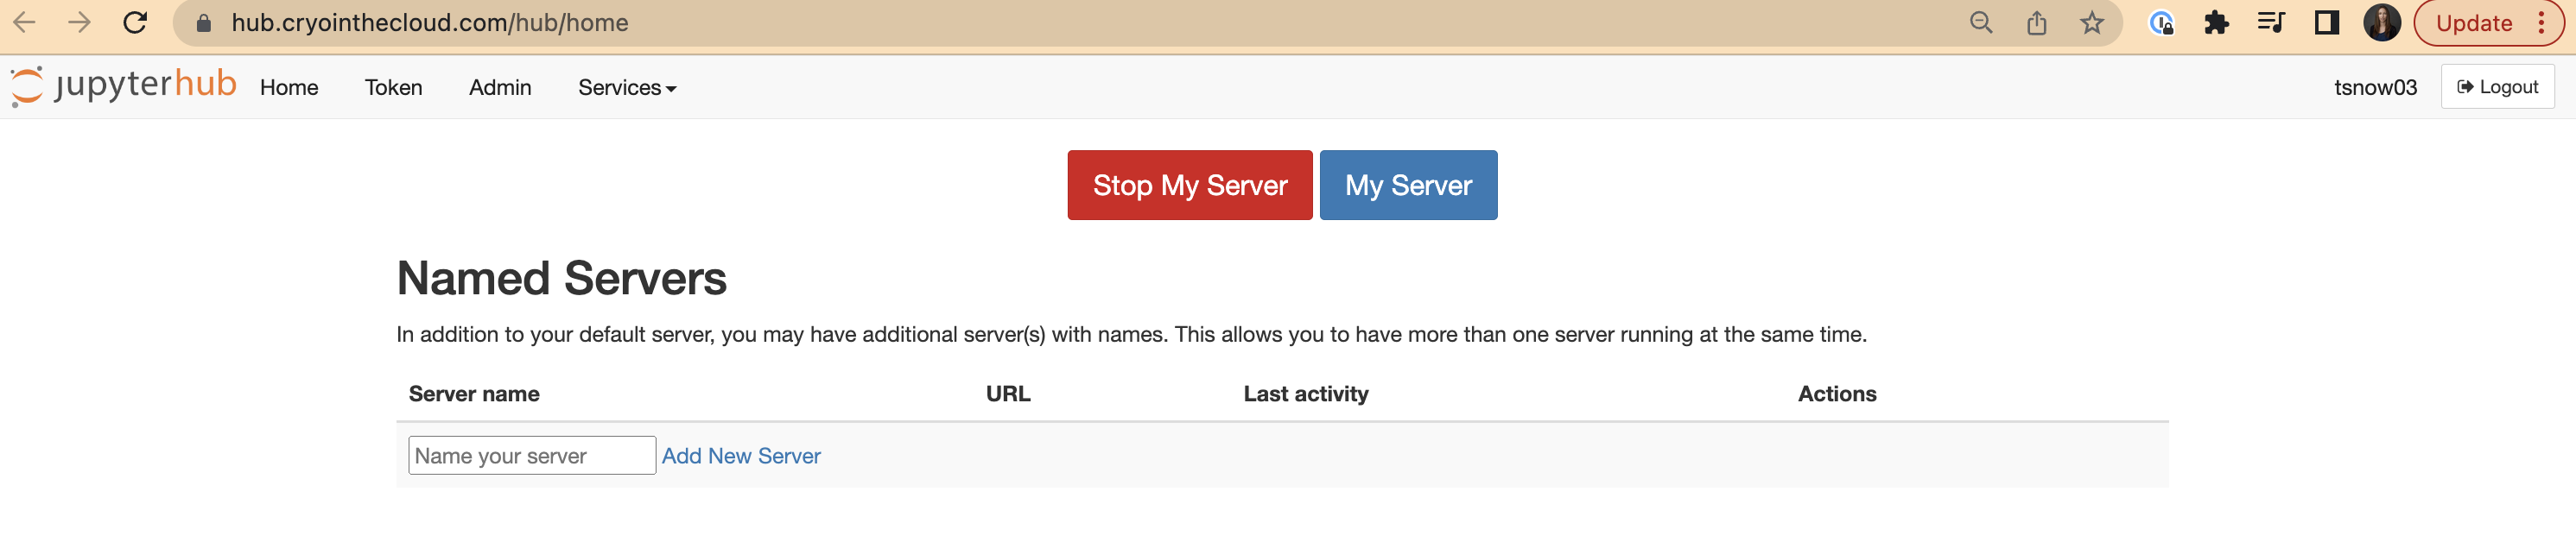
In upper left, click on
File>Hub Control Panel, which will open another tabClick the red
Stop Serverbutton. Once this button disappears after you clicked it, your server is off.Click
Log Outin the top right of your screen and you will be logged out, or you can start a new serverYou can now close this tab and the other tab where you were just working
Summary
🎉 Congratulations! You’ve completed this tutorial and have seen how we can access and use CryoCloud.
References
To learn more about CryoCloud, gain code for NASA data access, and find other Cryosphere tutorials check out this other documentation: